Learn how to use Salesforce Process Builder to automatically create a new opportunity based on an expiring contract.
April 22, 2015
Intro
Workflow capabilities have been available to Salesforce.com customers running enterprise edition or higher for many years.
Historically Workflow has allowed administrators to perform four types of actions based on some condition:
- Create a task
- Update a field
- Send an outbound message
- Send an email notification
While incredibly powerful, Workflow has lacked at least two key capabilities. The ability to create a record (other than a task) or populate a lookup field has required code in the form of an Apex trigger or logic in a Visualforce page. Administrators, developers and consultants all over the globe have been eager for the Spring ’15 release to hit their org since Process Builder was announced at Dreamforce last fall.
Why exactly is that? We can now automate a far greater number of tasks through a highly intuitive Visio like interface WITHOUT code!
Use Case
About two years ago a client of mine emailed me for some guidance. They are quite savvy with Salesforce and technology in general but lack development resources in house and have limited budget or appetite for code. This particular company is a professional services firm that sells service contracts which typically run about 12 months. Sixty days prior to expiration this client would like to create an Opportunity and have the sales rep begin working with the customer on a renewal. Further, they would like to track their pipeline for renewals and analyze their win/loss rate for this type of opportunity.
Prior to Process Builder this would have required manual work or the assistance of an Apex trigger. Now we can automate this without code. Here’s how:
Again, you will need an org running Enterprise, Unlimited, or Performance Edition to take advantage of this new feature.
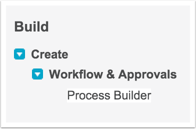
To get started navigate as follows:
Setup>Create>Workflow & Approvals>Process Builder
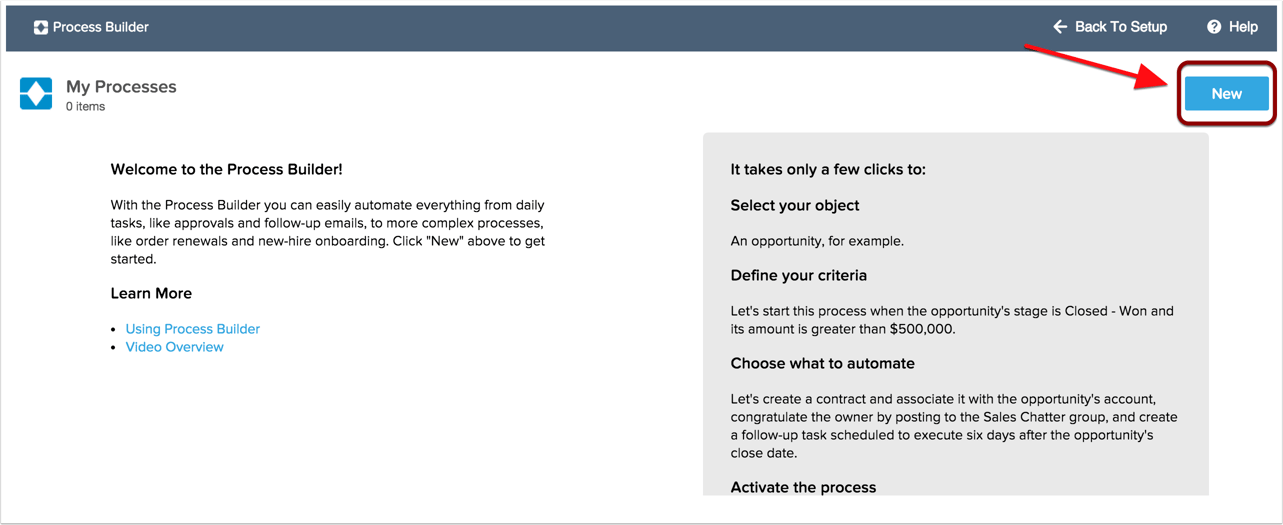
From here you will be greeted with the following welcome screen which includes some great resources to help you get started.
As you might have guessed, click new to begin.
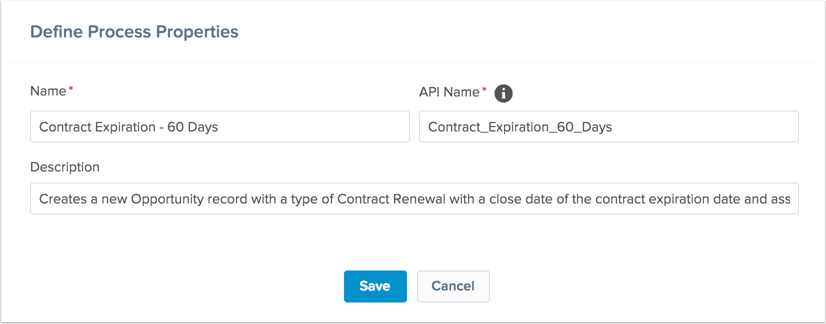
Name and Describe Your Process
Be mindful of other administrators or those who may come after you and give your process a name and description that are easy to understand. In this case the Process starts with the Contract object and fires 60 days prior to expiration.
Build the Process
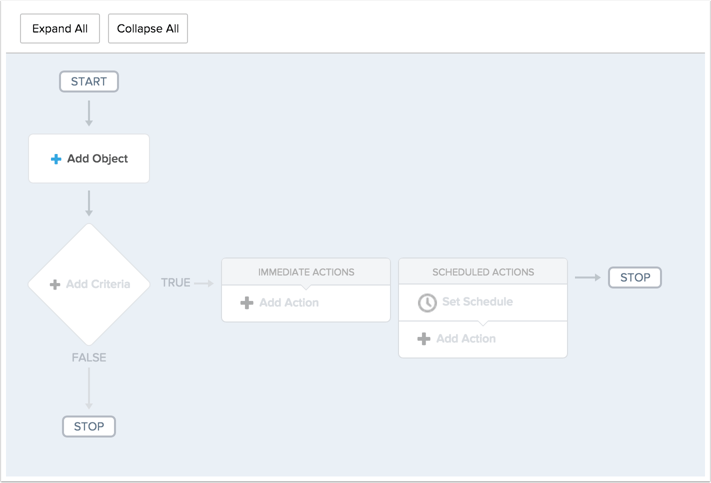
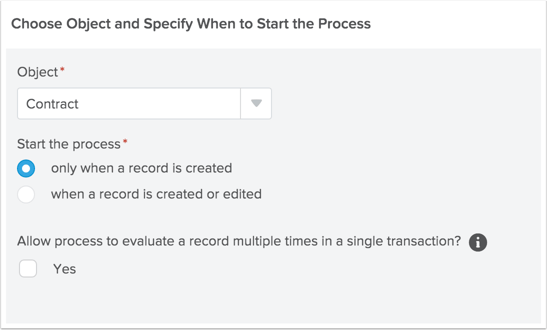
Select Object
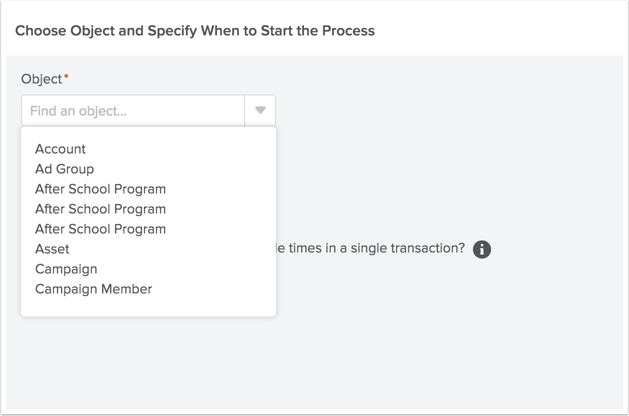
For our current use case we need to start with the Contract object and will only start the process on record creation. Your situation may vary.
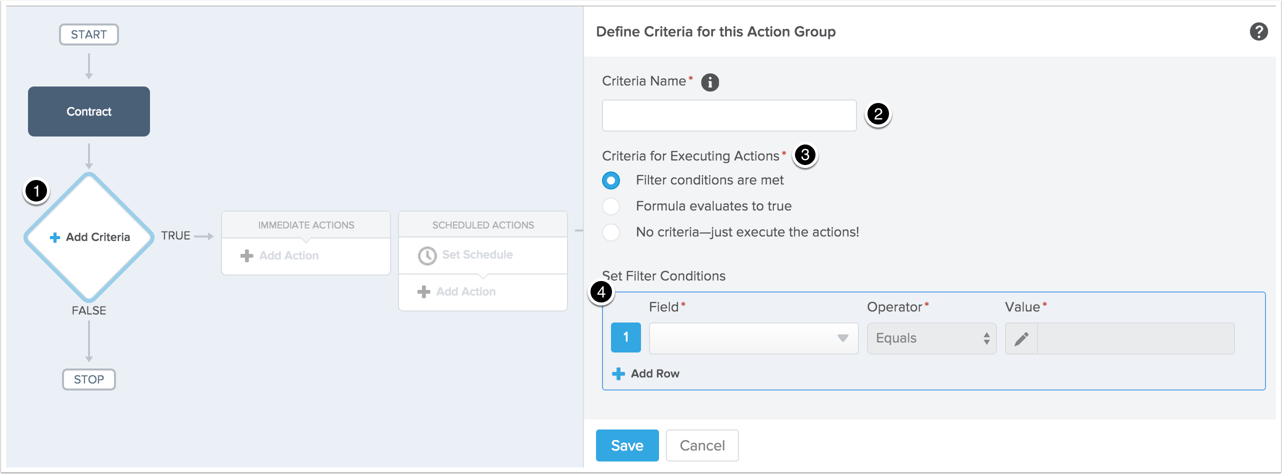
Create Conditions
From here we need to specify our criteria for when the process fires. My client needs this particular process to run for all Contracts. If your situation applies only to certain situations walk through the filter conditions wizard. It is quite intuitive and will feel familiar to anyone who has built custom reports or used workflow in the past.
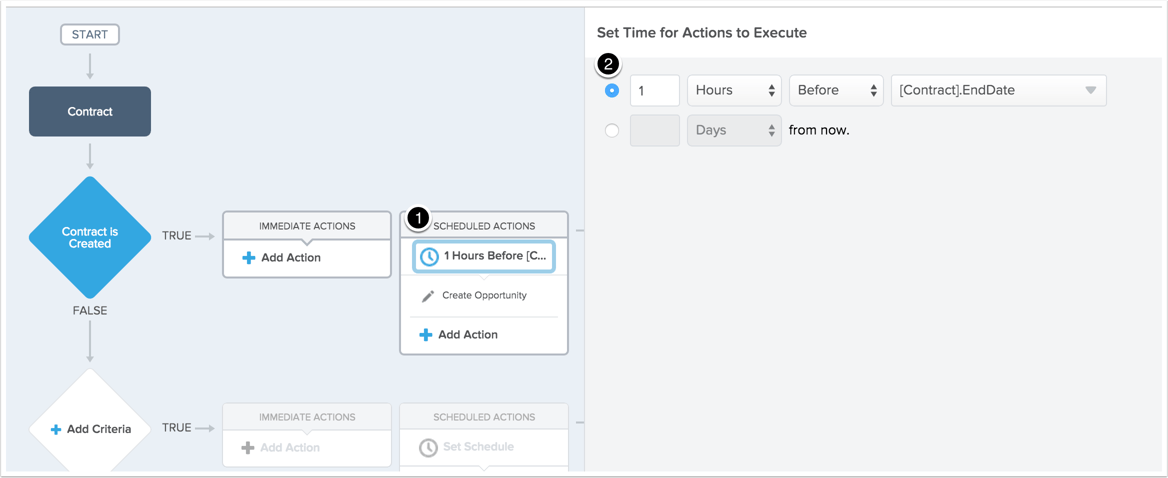
Set Time Parameters
Once our criteria has been established we need to tell Salesforce what we want it to do. There will be plenty of situations in which you need to do something immediately upon the condition being met in which case you would use the Immediate Actions section. In this use case we need to use Scheduled Actions.
As you look at the screenshot below you are probably wondering – why is the time for execution set to 1 Hour before the Contract End Date. The answer is that it would be more than difficult to wait 60 days to ensure that our process fired. We will run a test and if everything goes according to plan we will update the time parameters appropriately.
Hit the save button to move on.
Create Your Actions
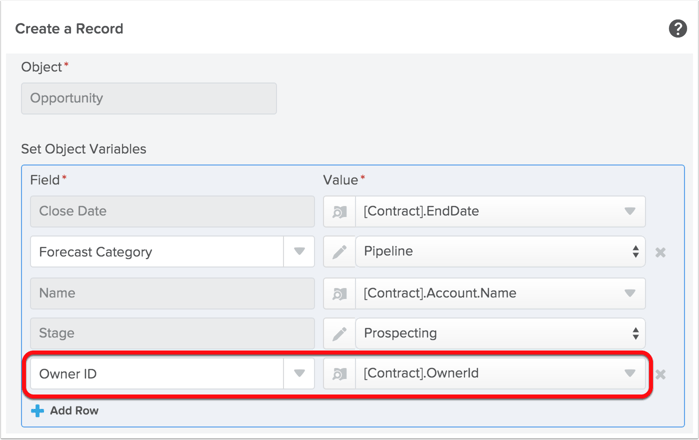
This is where things get really exciting. Again, with Workflow we could create a task, send an email, generate an outbound message or update a field. We have a LOT more options now including the ability to create a record which is what we want to do in this case.
You will note that outbound message is not an option in this menu. The legacy workflow engine is still available and will allow for this functionality if needed.

Next, we need to default field values. System required fields will be presented to you automatically. Be mindful of required custom fields or validation rules you may have built.
As was mentioned previously, one of the HUGE benefits of Process Builder is the ability to populate lookup fields. Owner is a lookup which we are populating with the Contract Owner ID. We could have also specified a specific User ID or the user ID of the Account owner or owner of any other records we have a custom lookup to from the Contract object.
You can continue to add actions in the given process node if necessary.
Activate and Test
I can’t tell you how many times I have built a workflow rule in the past, gone to test it and nothing happened. About nine times out of ten the failure was caused by an issue between the keyboard and the chair which usually meant that I forgot to activate it. Proces Builder works the same way – activate before you exit.
Now you’re off. Create a new Contract record and check to see that it worked. Assuming all went well come back and update your process to the appropriate time parameter.

Take it Further
My client took their use case a bit further. If you understand the mechanics described above you will easily be able to extend your process by automatically creating a new Contract if the Opportunity is closed won. You can even use Process Builder to add Opportunity Products.
Additional Considerations
Had we wanted the new automated process to fire on existing records there would be some additional effort involved. You might have thought that we could just change the criteria to run on the creation or edit of a record and then run a batch update. Keep in mind that if you use create or edit you can not use time based triggers.
What we would need to do in this case is export all of our existing Contract records using a report, Data Loader or some other data management utility like Dataloader.io, JitterBit, or Informatica. Be sure to include the ID’s of the contract records in your export file. We would then take the exported data and insert them as new records which would activate the process.
Time based actions from Process Builder are not found in the Time-Based Workflow section as you might expect. Instead navigate to Setup>Create>Workflow & Approval>Flows. The lower section of the screen will show a section called Paused and Waiting Interviews.
Once you have verified that your process has generated time based actions you would then need to use the ID’s from the export of the existing Contracts and use Data Loader to delete the original records.
The current version of Process Builder (Spring ’15) has some limitations though we fully expect Salesforce to continue adding functionality. One of the biggest ones to be aware of is that we can’t set field values using formulas. For example, I can’t use a formula to dynamically set dates -ex. Today + 30 Days. If you have a need for something like this I would encourage you to couple a Process with a traditional workflow rule with a field update action. Take a minute to vote up this Idea on the Idea Exchange.
Finally, when you begin auto creating records it is important to consider the impact on reporting. This is especially true when it comes to auto-generating Opportunity records. Update your pipeline and forecast reports accordingly. Perhaps you may need to add a record type or a custom field and filter for these in your analytics.
As always when implementing new functionality be sure to document your changes and communicate them to your stakeholders and end users.
Sound off in the comments below – what will your first process do?
.jpeg)